Faux Marble Countertops on a Budget
One of the most affordable upgrades we made in the rental property—one that made a huge visual impact—was painting the kitchen and bathroom countertops with a faux marble finish. I’m not exactly sure what material the original counters were made of (probably Formica), but considering the house is around 30 years old, they were definitely showing their age.
Like the previous owners, we weren’t looking to drop thousands on new countertops. The budget just wasn’t there. The former owner had also tried to give them a facelift by painting them, but she went with a dark finish. While that helped hide imperfections, it also made the space feel smaller and more closed in—especially in contrast with the white cabinets.
So, I decided to flip that idea on its head: light countertops and darker cabinets. After doing a ton of research, I landed on a faux marble countertop kit by Rust-Oleum. It had great reviews and the process seemed beginner-friendly and straightforward. I purchased the kit from Amazon for $70.

The Process
Step One: Clean + Base Coat
The kit comes with a cleaner, which I used to give the countertops a thorough scrub. Then I rolled on the white base coat—two layers in total, since I was covering such a dark surface. Honestly, even just the white base brightened up the kitchen so much, I considered stopping there! But I was committed.

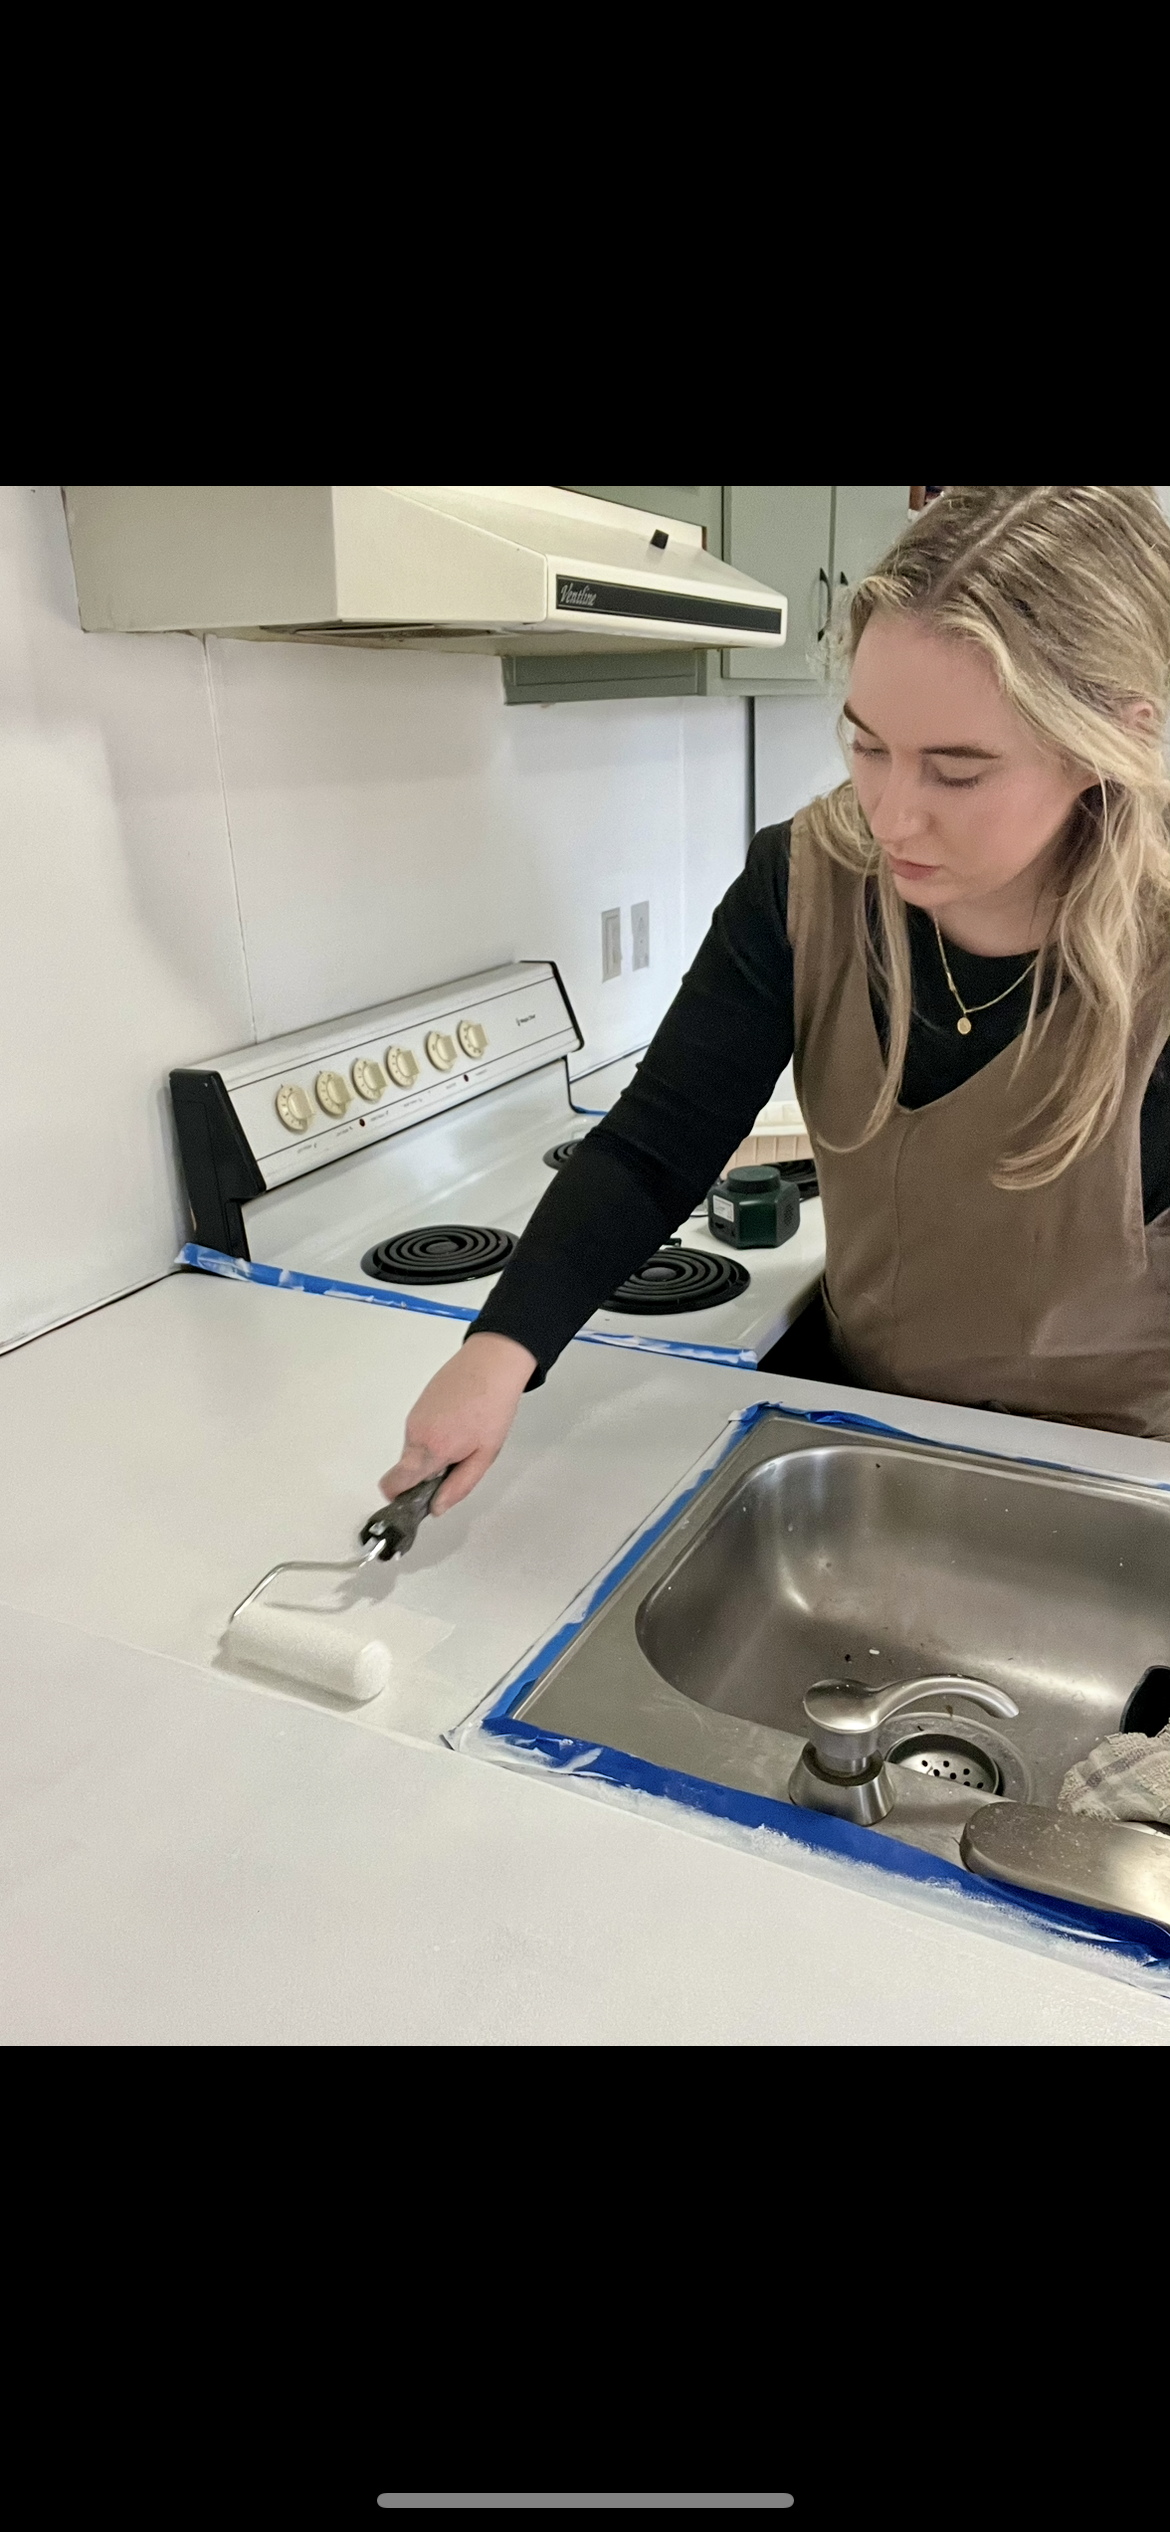
Step Two: Marble Veining
Here’s where things got a little scary. The kit suggests creating fine, detailed veining—but I knew that wasn’t my strength. Instead, I went for bolder, larger veins inspired by more dramatic marble slabs (like the photos below). It felt more achievable and still made a big statement.


The method that worked best for me was this:
Use a small artist’s brush to draw a vein with the gray paint from the kit
Then, immediately take a dry 1-inch brush to gently feather or smear the line
This created that soft, natural-looking marble effect. I kept all the veins flowing in the same general direction for consistency and made each one a little different so they looked organic.
Step Three: Add Warmth (Optional)
I wanted a bit more depth, so I went rogue. I grabbed a few leftover paint samples in warm beige tones and, using a super fine brush, added subtle hints of color to some of the veining. It added a beautiful warmth and dimension that I think took the whole look up a notch.


Step Four: Seal It
Once everything dried overnight, I sealed the countertops with the clear topcoat included in the kit—two coats for good measure. That was it!
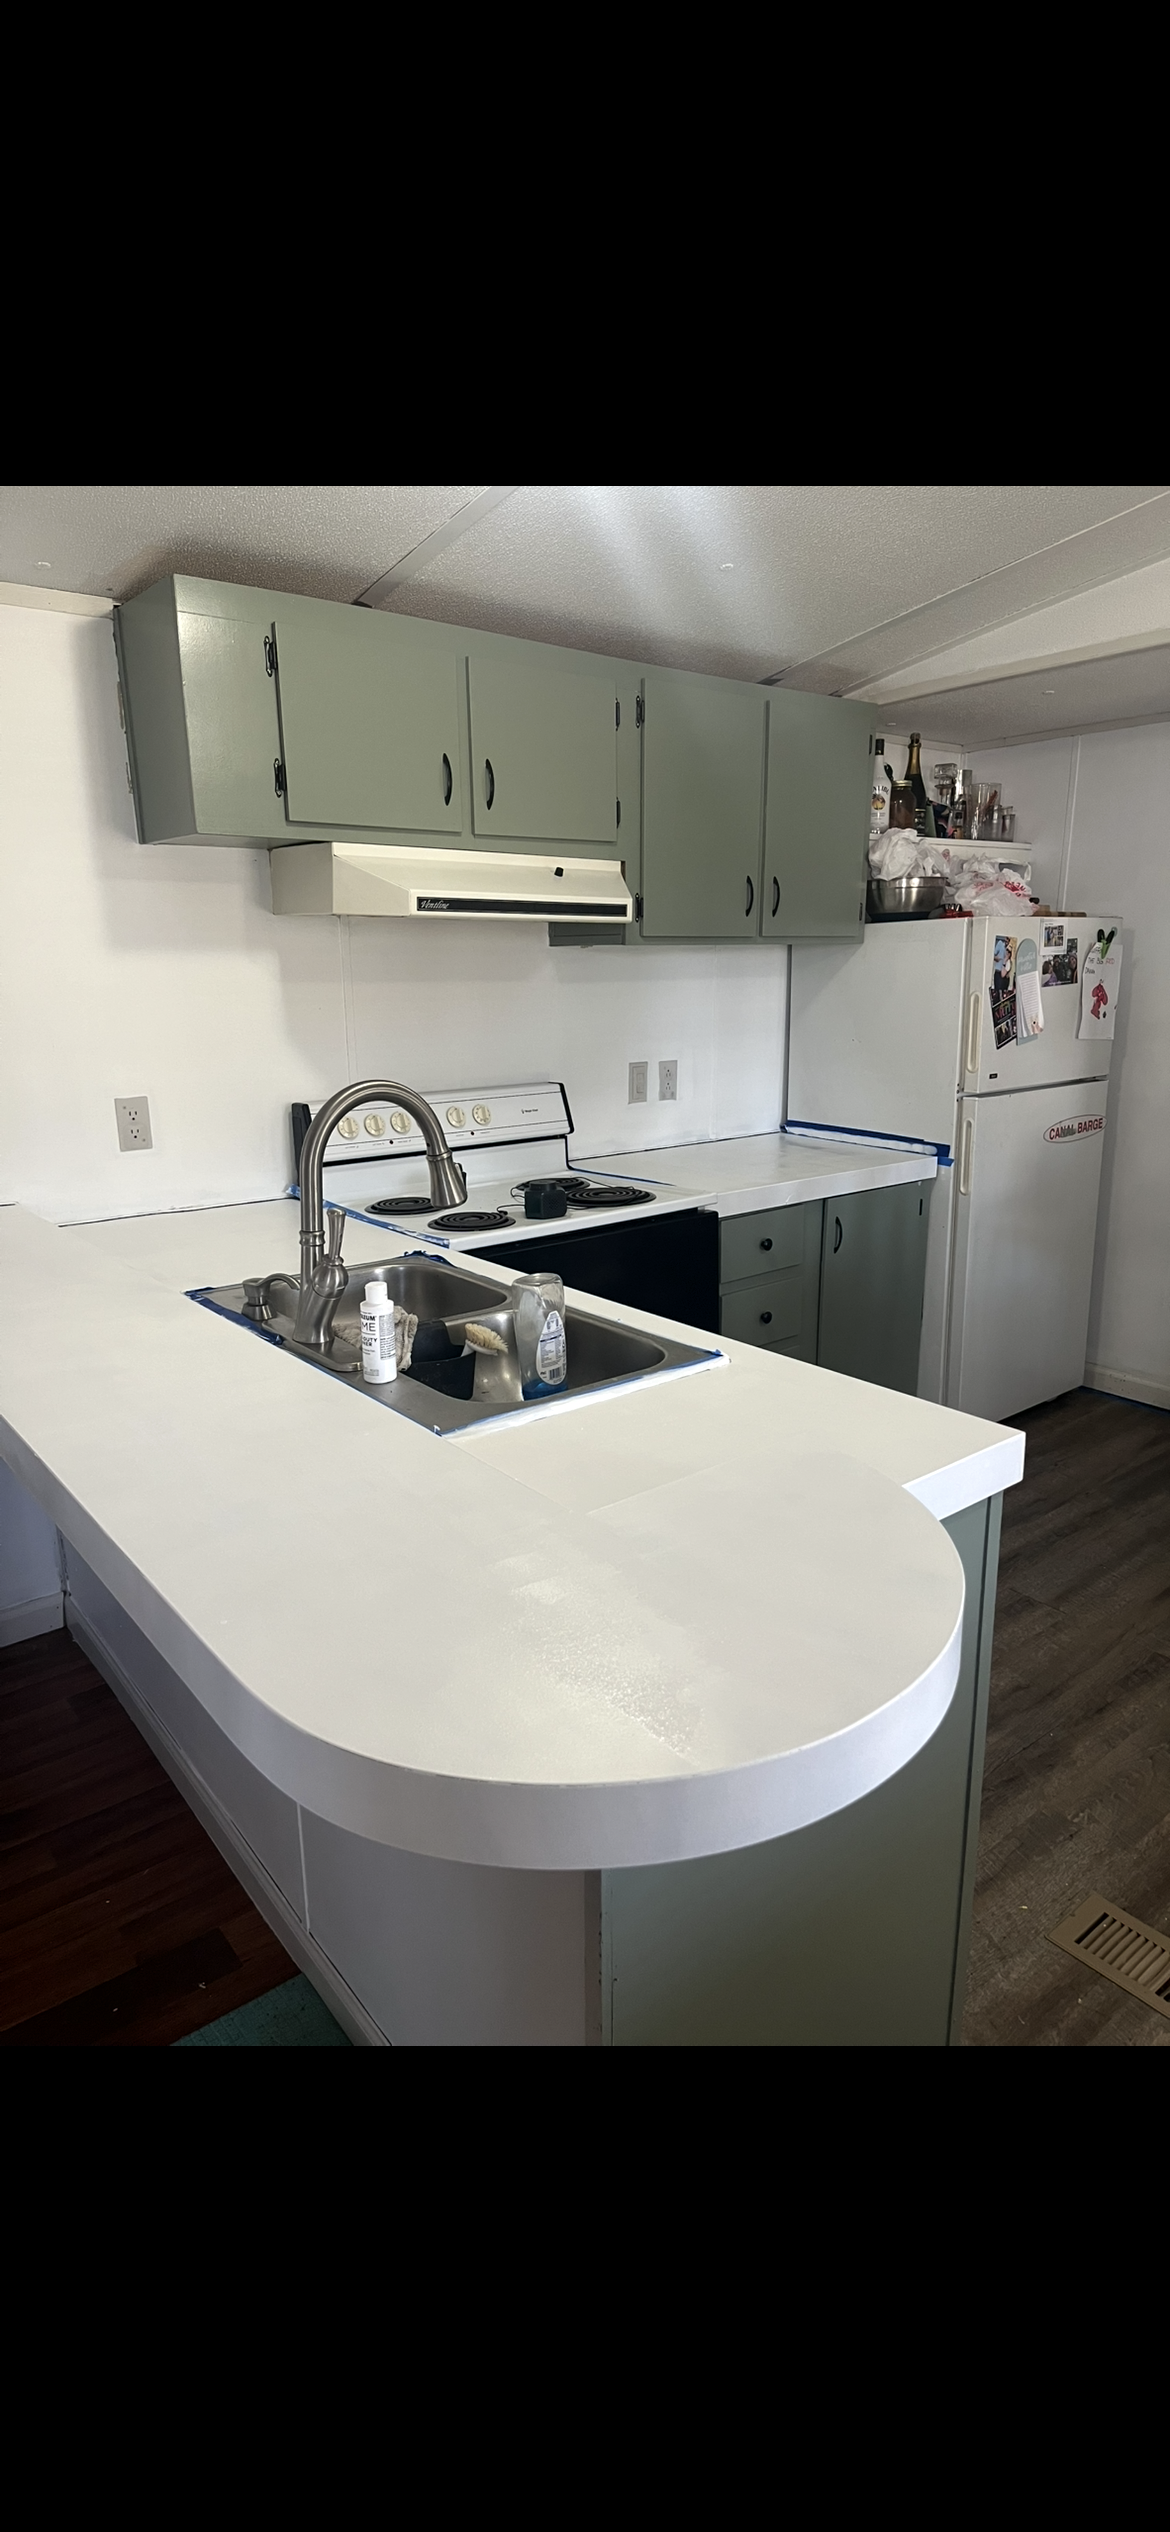
Final Thoughts
I love how these countertops turned out. They gave both the bathroom and kitchen a completely fresh, modern look for a fraction of the cost of real stone. This project was beginner-friendly and budget-conscious—and I’d absolutely do it again.
✨ Want to see the bathroom countertop in action? Check out last week’s bathroom reveal! And be sure to stay tuned for the full kitchen transformation—it might just be my favorite room in the house.
💬 Let me know in the comments—would you ever try painting your countertops?